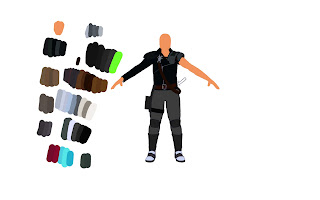
We had to create one of the archetypes of the story (Huntsman, Princess, King, Giant or Watchdog), while the setting was free and we were encouraged to not use the classic fairy tales scenario.
Everything from concept, design, modelling, texturing was our task.
Referencesheets:
A pool of accessoires I collected for my project. In the end, none of them were used.
Most of the references I used for my huntsman.
Some of the references I collected on the princess. There was a mass of possible references and very good onces too. I decided against it, since it would have been extremely complicated for the first character. Especially the hair.
References on the Rifle I collected. Since the scenerio was a futuristic one, the rifles Biathlon athletes use were perfect. If I've had the time, I'd have made one similar to these, except for the texture of course.
References I looked up for the hunters sword.
Concept:
Some of the tryouts. They were created in a pretty short time, since the first silhouttes didn't work out, I used some of the references for the silhouttes. They look good, but I had problems drawing equipment into the silhouettes. One reason for that was, that it was hard for me to imagine how it would react to the pose and the other of course was my lack of practice in drawing.
So I switched into drawing a basic T-Pose and drew the equipment into it.
So I switched into drawing a basic T-Pose and drew the equipment into it.
Outlines front.
Sideview outlines.
Outlines for the rifle.
Outlines for the sword.
Modelling:
First of my steps while modelling the body: The torso.
Torso with leg.
Early mesh of the body. One side is duplicated as an instance so you better see how it will look in the end. Changes will appear on both sides. I used the hands I already did for an exercise and tweaked them a bit to save some time.
Early mesh of the head.
Finished mesh of the ear, of course it was tweaked a lot after and before merging with the head.
Mesh of the head before exporting it into the main maya file.
Finished mesh with a checker texture on it. This texture or it's equivalents are essential for texturing. You can see were the UV maps have to be tweaked so the colourmap wont be blurry.
Texturing:
Final UV layout.
First stage of texturing. Basecolours and blood is set plus most of the landmarks, where details, shadows and highlights will be set.
Leather jacket with some details
Texture with some more details.
Textures with most details
Final Colourmap.
Specular Map.
Finished mesh with textures placed on top of a provided socket and light setting.
Rendering:
Front.
Left.
Back.
Right.
Closeup rendering.
Character-Sheet:
Character sheet one.


